Explore T11 Wreck – Koh Chang's Legendary Shipwreck Dive
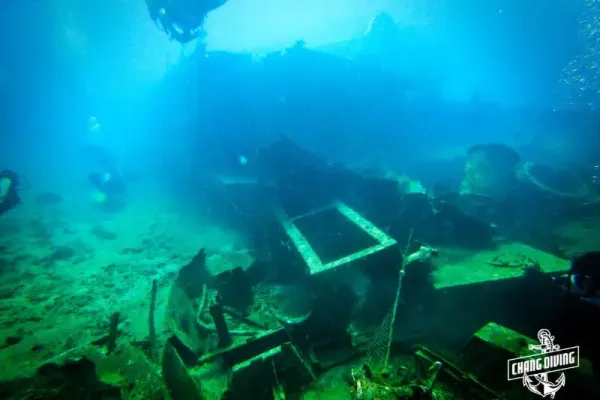
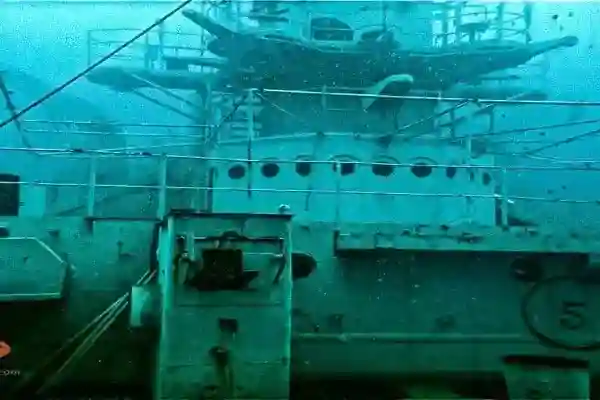
Picture descending through crystal-clear water toward the silhouette of a 30-meter patrol gunship resting on the seabed – its hull split in two, now encrusted with soft corals and surrounded by schools of curious fish. Welcome to the T11 Wreck, one of Koh Chang's most accessible and rewarding wreck dives. Located just 50 meters from Hin Raab South, Secret Reef, and Blueberry Hill, this historic vessel has transformed into a thriving artificial reef that attracts divers of all levels.
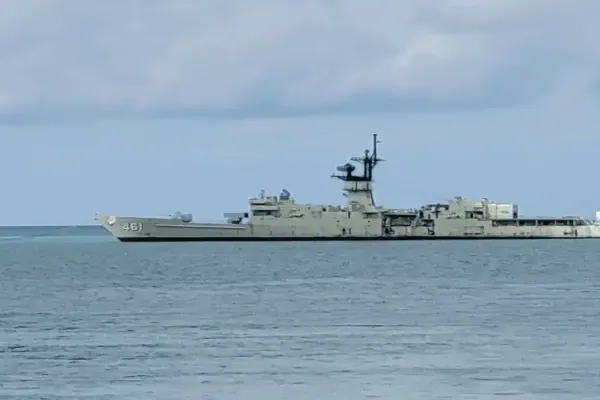
The T11 (formerly known as PGM 71) has a fascinating history. Built by the US Navy and launched on September 14, 1964, it was transferred to the Royal Thai Navy on May 5, 1965, serving as a coastal patrol vessel. On December 17, 2013, the ship was intentionally sunk to create an artificial reef – and it has since become one of Koh Chang's most popular wreck dives. At just 16 meters maximum depth, the T11 is perfect for Open Water certified divers, making it an ideal introduction to wreck diving and a top choice for specialty training.
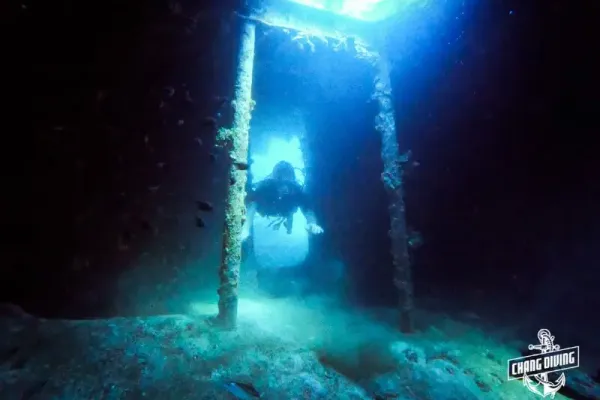
What makes the T11 special is its versatility. The wreck has split in half, creating exciting swim-through opportunities and multiple areas to explore. The structure is now covered with soft corals and marine growth, attracting bamboo sharks, triggerfish, lionfish, scorpionfish, groupers, and countless reef fish. Divers often spot the famous "compass-wearing" triggerfish – a resident character that has become a site mascot. The shallow depth and calm conditions make the T11 perfect for practicing wreck navigation and penetration skills, while the abundant marine life ensures every dive feels like an adventure.
Why Dive at T11 Wreck?
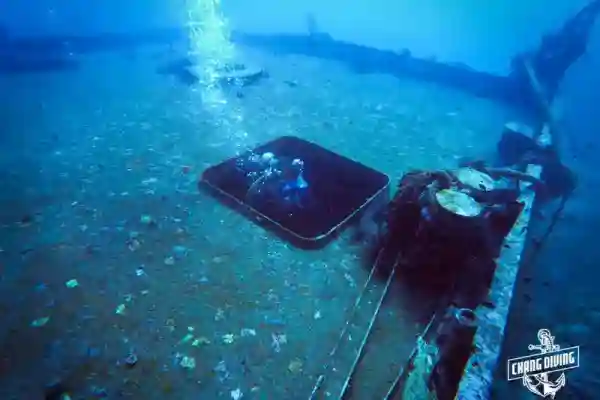
- Shipwreck Adventure: Explore the remains of a 30-meter-long patrol gunship that has split in half, offering exciting areas to explore.
- Wreck Diving & Navigation Training: Ideal for specialty courses, the wreck is perfect for practicing navigation and wreck diving skills.
- Marine Life & Hidden Creatures: Spot bamboo sharks, schools of fish, and even a "compass-wearing" triggerfish!
Dive Site Overview
| Max Depth | 16 meters |
|---|---|
| Ship Length | 30 meters (split hull) |
| Marine Life | Bamboo sharks, triggerfish, lionfish, scorpionfish, groupers, schools of reef fish, soft corals |
Don't miss your chance to explore this legendary shipwreck! Book a fun dive or specialty wreck course with Chang Diving Center today!

Diver Level for this dive site.
Min. certification level: Junior, Open Water Diver (or equalled) Try Diving possibility: No Snorkelling possibility: NoDive Briefing Example for Dive Professionals – T11 Wreck
This is a comprehensive dive briefing template/example for dive professionals. Use this as a reference guide to structure your own briefings. Customize the placeholders (marked with square brackets) with your specific information, guide names, and current conditions. This ensures a safe, organized, and professional dive briefing experience.
1. Dive Site Name & Introduction
Hello everyone and welcome to the T11 Wreck! The T11 is one of Koh Chang's most accessible wreck dives – a 30-meter patrol gunship sunk in 2013 to create an artificial reef. At just 16 meters maximum depth, it's perfect for Open Water divers and ideal for wreck specialty training. The hull has split in two, creating exciting swim-through opportunities and multiple areas to explore. The structure is now covered with soft corals and marine life.
My name is [Your Name] and I will be your dive guide today. The T11 is located near Hin Raab South, Secret Reef, and Blueberry Hill – we often combine it with one of these sites for a two-dive day.
2. Site Description & Dive Route
We have good conditions today at the T11. The wreck sits upright on the seabed with the hull split – we'll explore both sections.
- Maximum Depth: 16 meters (wreck bottom)
- Dive Route: We'll descend along the mooring line to approximately 16 meters depth. From there, we'll explore the wreck structure. The split hull creates natural swim-throughs – we'll follow a route that allows us to see both sections. We'll stay outside the wreck unless you're on a wreck penetration course. Return to the mooring line for our safety stop.
- Site Features: 30-meter patrol gunship (PGM 71), split hull, soft coral coverage, artificial reef since 2013.
- Weather Conditions: [Current conditions - e.g. "Clear water, good visibility, minimal current"]
What You Can See at the T11 Wreck
The T11 has become a thriving artificial reef. During your dive, look for:
- Bamboo sharks – often resting near or under the wreck
- Triggerfish – including our famous "compass-wearing" resident
- Lionfish, scorpionfish, groupers – hiding in the structure
- Schools of reef fish – barracudas, snappers, and countless smaller species
For a complete guide to marine life in Koh Chang, check our Marine Life Guide.
3. Your Guide's Role & Positioning
I will be leading this dive and wearing [Color] and [Color] fins with a [Description of equipment/identifying feature]. You can easily identify me by [specific visual identifier - e.g. "my bright yellow BCD with the Chang Diving logo"].
[If applicable] Our Divemaster [Name] will be positioned at the back of the group, keeping an eye on everyone. [Name] will be wearing [Color] fins and will use [signal device - e.g. "this tank banger"] to get your attention if needed.
Important: Stay close to the group and maintain visual contact with your buddy and guide at all times. If you need to communicate, use standard hand signals or get my attention by tapping on your tank.
4. Entry & Exit Techniques
Boat Entry (Giant Stride)
We'll enter the water from the side of the dive boat with a Giant Stride. Here's what you should remember:
- Pre-Dive Safety Check: Complete your BIG WHALES REALLY ARE FUN check before entering the water
- BCD Inflation: Fully inflate your BCD before entry
- Regulator: Keep your regulator in your mouth
- Mask: Make sure your mask is properly fitted
- Entry: Step forward with one leg, then the other, keeping legs together
- After Entry: Clear the area immediately, signal OK, and swim to the mooring line
Boat Exit (Ladder)
After completing your safety stop and surfacing:
- Swim back to the ladder on the side of the boat
- Stand on the ladder and remove your fins (hand them to the crew)
- Climb up the ladder with your regulator still in your mouth
- CRITICAL: Never position yourself directly under another diver climbing the ladder
- Once on deck, move away from the entry/exit area
Dinghy Entry (Backroll)
If we're using a dinghy, we'll enter with a backroll entry:
- Sit on the edge of the dinghy with your back to the water
- Complete your pre-dive safety check
- Hold your mask and regulator in place
- On three, lean back and roll into the water
- Clear the area and signal OK
5. Dive Procedures & Turn-Around Points
To ensure we have enough air for a safe return and safety stop:
- Turn-Around Point: We'll turn the dive around when you reach 130 bar (or 1900 PSI). This gives us more than enough air reserve to safely return to the mooring line and complete our safety stop.
- Air Monitoring: Check your air gauge frequently throughout the dive. Don't wait until you're low on air to signal – communicate early!
- Safety Stop: At 5 meters depth, we'll conduct a 3-minute safety stop at the mooring line before surfacing.
- No-Decompression Limits: At 16 meters depth, we'll keep the dive well within safe limits.
Remember: The most important rule in diving is to never hold your breath. Breathe normally and continuously throughout the entire dive.
6. Emergency Procedures
While we don't expect any problems, it's important that everyone knows what to do in an emergency:
Buddy Separation
- If you become separated from your buddy, search for 1 minute while staying at the same depth
- If you can't find your buddy, make a controlled safety ascent to the surface
- Wait at the surface – we'll reunite there
- DO NOT continue diving alone
Out of Air / Low on Air
- Low on Air: Signal immediately – we'll end the dive and ascend together
- Out of Air: Signal "out of air" and use your buddy's alternate air source or make a controlled emergency swimming ascent (CESA)
- Always signal problems early – don't wait until it's an emergency!
Emergency Contacts & Equipment
- Police: 191
- Tourist Police: 1155
- Emergency Medical Service: 1669
- DAN International: +1-919-684-9111 (24/7 emergency hotline for dive emergencies)
- Recompression Chamber: Koh Chang Hospital, Phone: 039 521-657 or 039 586-131
- Suspected DCS: See our DCS Field Evaluation Slate (PDF) for assessment procedures
- Emergency Oxygen: Located in the transport box on the right of the captain's seat in the captain's cabin
- First Aid Kit: Located in the transport box on the right of the captain's seat in the captain's cabin
- Emergency Action Plan: For detailed emergency procedures, see our Emergency Plan Guide
7. Hand Signal Review
Hand signals can vary between countries and certification agencies, so let's make sure we're all on the same page. Here are the essential signals we'll be using today:
- OK: [Description/visual] - Used to ask "Are you OK?" and respond "I'm OK"
- Problem: [Description/visual] - Hand waved side to side to indicate a problem
- Up: [Description/visual] - Thumbs up means "I want to go up"
- Down: [Description/visual] - Thumbs down means "I want to go down"
- Air Pressure: [Description/visual] - Show numbers with fingers (e.g. "I have 120 bar")
- Low on Air: [Description/visual] - Hand across throat
- Out of Air: [Description/visual] - Hand across throat, then point to regulator
- Safety Stop: [Description/visual] - Hand horizontal, palm down, at 5 meters
- Stop/Hold: [Description/visual] - Hand up, palm forward
- Look/Point: [Description/visual] - Point at something interesting
Practice Question: Can you show me how you would communicate that you still have 120 bar of air pressure?
📋 Download Complete Hand Signal Guide (PDF)
8. Roster & Buddy Check (Pairing)
Let's make sure everyone is here and properly paired:
- Roster Check: [Go through names] - Is everyone here?
-
Buddy Pairs:
- [Name] and [Name] - you'll be buddies
- [Name] and [Name] - you'll be buddies
- [Name] - you'll be my buddy today (for less experienced divers)
- Buddy Check: Before entering the water, do a final check with your buddy – make sure all equipment is secure and functioning
Note: Buddy pairs are typically matched by experience level and certification. If you'd like to dive with a specific person, let me know now.
9. Environmental Awareness & Marine Hazards
The T11 is an artificial reef, and we must respect the marine environment and wreck structure:
- General Rule: Look but don't touch. Avoid contact with all marine life, including corals and fish
-
Marine Life to Be Aware Of:
- Lionfish & Scorpionfish: Venomous spines – maintain respectful distance and never touch
- Soft Corals: The wreck is covered with soft corals – excellent buoyancy control is essential to avoid damage
- Bamboo Sharks: Often resting under the wreck – observe from a distance, avoid disturbing
- Triggerfish: Can be territorial during nesting season – maintain respectful distance
- Wreck Penetration: Only enter the wreck if you're certified and with your instructor. Never penetrate alone
- Buoyancy Control: Maintain excellent buoyancy to avoid damaging the corals or stirring up sediment
- Conservation: Take only photos, leave only bubbles. Never remove anything from the wreck
10. Pre-Dive Safety Check
Before every dive, we use the acronym "BIG WHALES REALLY ARE FUN" to make sure nothing is forgotten. For a detailed guide on why safety checks are important and how to do them correctly, check out our Safety Check Guide:
- B - BCD: Check that your BCD inflates and deflates correctly. Test the power inflator and dump valves.
- I - Inflation: Make sure your BCD fits properly and all straps are secure.
- G - Gauges: Check your SPG (submersible pressure gauge), depth gauge, and computer. Make sure they're working and readable.
- W - Weights: Check that your weight belt or integrated weights are secure and properly positioned.
- H - Hose: Check all hoses for kinks or damage. Make sure your regulator hoses are routed correctly.
- A - Air: Turn on your air, check your tank pressure, and take 2-3 breaths from your regulator.
- L - Releases: Test all quick releases on your BCD, weight system, and any other equipment.
- E - Everything: Check once more that everything is in place and working.
- S - Snaps: Make sure all buckles and fasteners are secure.
- R - Releases: (Second check) Verify that all releases are functioning.
- E - Everything: Final check – is everything ready?
- A - Air: Final air check – regulator working, tank pressure good.
- L - Look: Look around – is your buddy ready? Is the entry area clear?
- L - Listen: Listen for final instructions from your guide.
- Y - You: Are YOU ready? Take a deep breath, relax, and enjoy the dive!
- A - Again: One more quick check – everything safe?
- R - Ready: Are you ready to dive?
- E - Everything: Final everything check.
- F - Fun: Remember – diving is FUN! Relax and enjoy!
- U - Underwater: Ready to go underwater?
- N - Now: Let's dive NOW!
Pro Tip: Do this check with your buddy. It's a great way to catch problems before entering the water and helps build confidence.
📋 Quick Briefing Checklist
- ✅ Site name and conditions understood
- ✅ Dive route and depths clear
- ✅ Guide identification confirmed
- ✅ Entry/exit procedures reviewed
- ✅ Turn-around points and air reserves understood
- ✅ Emergency procedures clear
- ✅ Hand signals reviewed
- ✅ Buddy paired and checked
- ✅ Environmental awareness discussed
- ✅ Pre-dive safety check completed
Questions? If you have any questions or concerns, please ask now - I'm here to help! Remember, there are no stupid questions when it comes to dive safety. Let's have a safe and amazing dive! 🌊🤿
📝 After Your Dive: Log Your Experience
Don't forget to log your dive! Your dive logbook is an important record of your diving experience and is required for many advanced courses. Whether you use a digital app or a traditional logbook, make sure to record:
- Date and location
- Dive site name (T11 Wreck)
- Maximum depth and dive duration
- Air consumption (start and end pressure)
- Your buddy and guide
- Highlights (bamboo sharks, triggerfish, lionfish, scorpionfish, wreck structure, etc.)
For more information on why dive logbooks are important and what to include, check out our Dive Logbook Guide. You can find the dive site stamp and get your logbook signed by your guide at the coffee station on the boat.
What other divers discovered
Real reviews and experiences from our guests – see what others found on their diving adventures with us!
More Wreck Dives
Explore more wreck diving adventures around Koh Chang. These historic wrecks offer fascinating underwater exploration and abundant marine life.
⚓ HTMS Chang Wreck
Thailand's most famous wreck dive! Explore this impressive ex-Navy vessel with stunning coral growth and diverse marine life. (Max depth: 31m)

🚢 Koho Maru 5
Dive the historic Japanese cargo ship from WWII. An atmospheric wreck with fascinating history and marine encrustation. (Max depth: 43m)
🛳️ Phutthayotfa Wreck
Discover this Thai Navy vessel wreck with impressive structure and thriving coral growth. Great for underwater photographers. (Max depth: 40m)
🗺️ View All Sites
Explore all 13 dive sites around Koh Chang. From shallow reefs to deep wrecks - find your perfect dive adventure.